Instructions for creating User-defined tolerances tables
The tolerance table is located in the following directory (depending on the OS):
C:\Program Files\ELIAS GmbH\infra-CONVERT\ToleranceTables\
Or
C:\Programme\ELIAS GmbH\infra-CONVERT\ToleranceTables\
Every tolerance table in this directory has an ini file. If you want to create a new tolerance table you first have to create the corresponding ini file. It is probably easier to copy an existing ini file, rename it and then adapted to your specific needs. The file can be created as a text file in a standard document editor.
To make the job easier, first save the prospective ini file as a simple *txt file, open it in Microsoft Excel, make the changes you want, export it as a *.txt file from Excel and rename as an *.ini file.
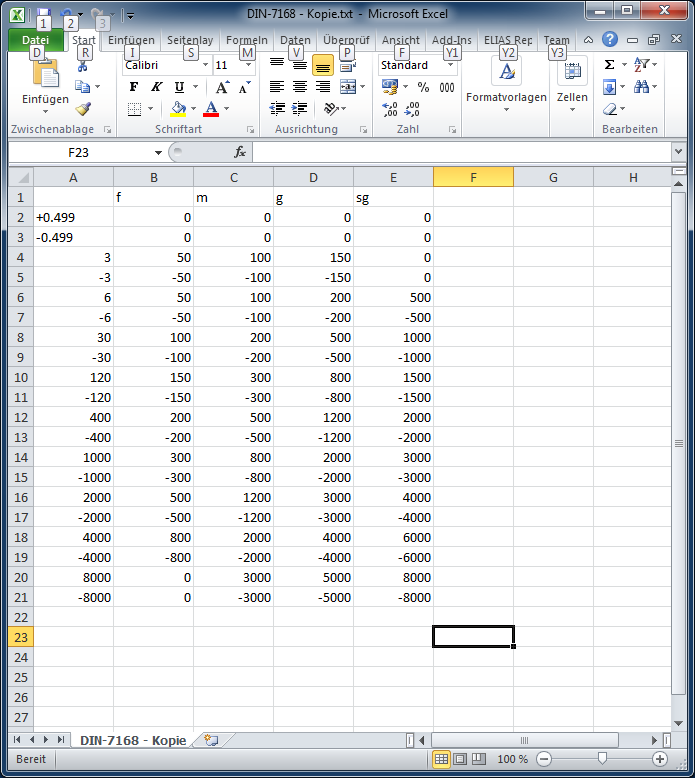
The following screen shot shows DIN-7168 in Excel.
The first row contains the column titles also displayed in infra-CONVERT. Column 1 contains the maximum value and next to it the max. tolerance in microns. Rows are grouped in pairs, needed for the upper and lower tolerances respectively.
Example: For values up to 0.5mm the norm defines no tolerances. Therefore, in the first column contains values +0.499 and -0.499 in rows 2 and 3 respectively. This means that when a value is greater or equal to 0, and less than or equal to 0.499, the permitted tolerances in these rows are zero for all columns, thus +0.499 as the upper tolerance entry and -0.499 the lower tolerance entry. The next pair of rows contain tolerances for values from 0.5 – 3.0. This means that when the value is greater than 0.499 and less than or equal to 3.0, the tolerances are read from these rows.
Step by step instructions (example)
- Open C:\Program Files\ELIAS GmbH\infra-CONVERT\ToleranceTables\in Windows Explorer:
- Make a copy of DIN-7168.ini (e.g. highlight file, key combination, copy with “Crtl + C”, paste with “Ctrl + V”).
- Rename the file as Test.ini.
- Double-click to open the file (the Windows text editor should open).
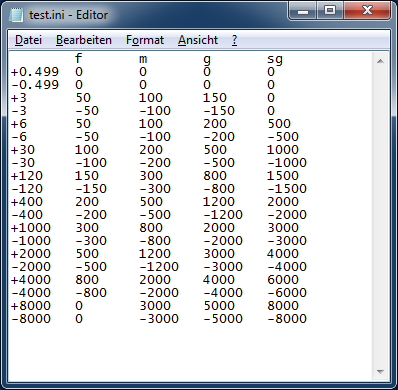
You can start Microsoft Excel and drag the Test.ini file to Excel window.
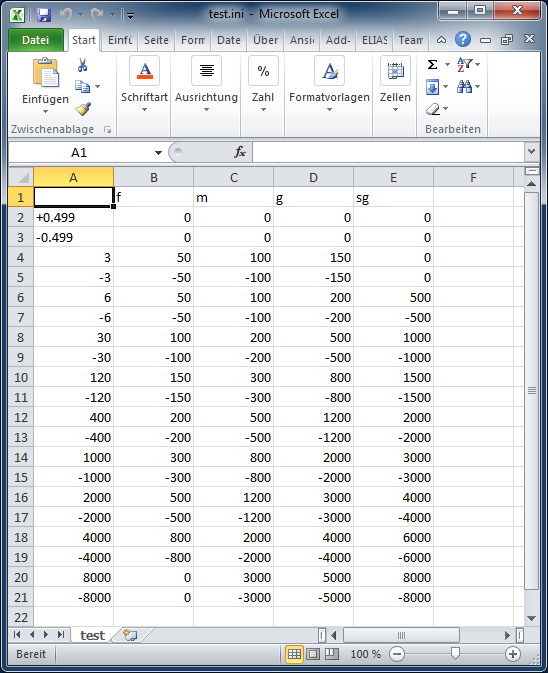
Tip: Alternatively you can rename the file as an ini file and simply open it in Microsoft Excel, edit it, save (Text MS-DOS .TXT) and rename it as Test.ini.
- Make the changes to the table – you insert, delete and edit columns, or delete, insert and change rows as you required.
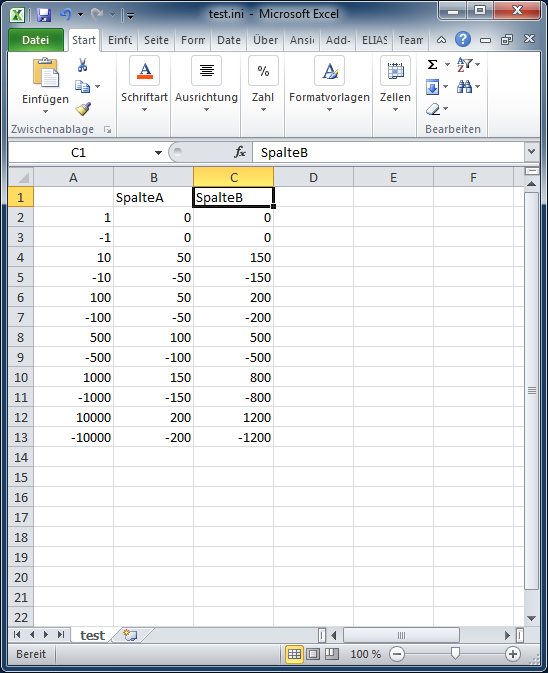
Important: The column headings must not contain a space!
Important: When you edit the file in the text editor programme make sure that numbers in the rows are separated by a tabs stop!
- Save the changes as a Test.ini to the directory to complete definition of the tolerance table.
To view the table in infra-CONVERT you also need to process the ToleranceTables.xml in the same directory.
- Highlight the file and right-click with the mouse and select “Edit”
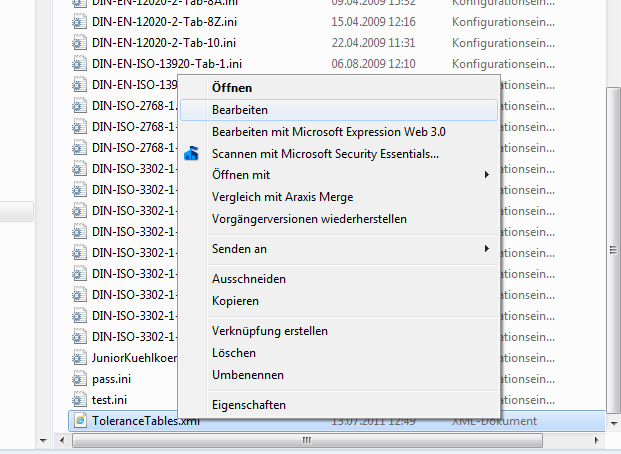
- The XML file opens in the editor. This file has three sections:
- <Standard>: The section contains tolerance tables for length
- <Radius>: This section contains tolerance tables for curves and radii
- <Angle>: This section contains tolerance tables for angles
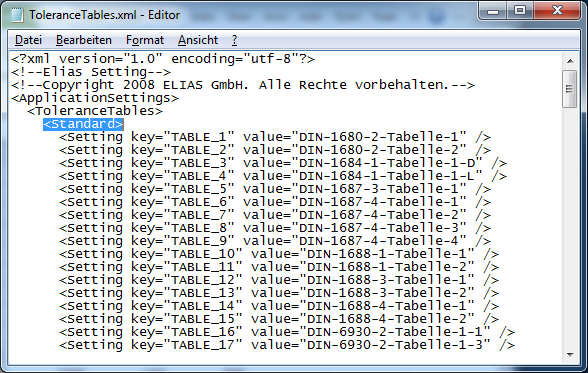
- Scroll to the last entry in <Standard>:
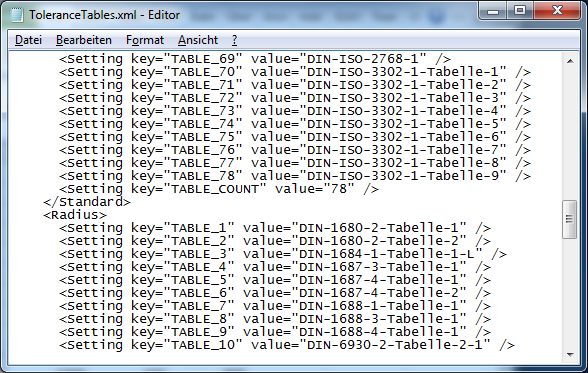
- Copy the last row:
<Setting key=“TABLE_78” value=“DIN-ISO-3302-1-Tabelle-9” />
and insert the copy directly beneath the last entry:
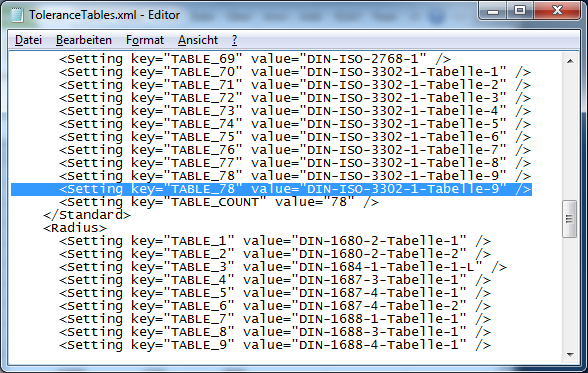
- Change the inserted row from
<Setting key=“TABLE_78” value=“DIN-ISO-3302-1-Tabelle-9” />
to
<Setting key=“TABLE_79” value=“Test” />
You need to change the value for “key”, in that the table number needs to be increased by 1 (78→79) and enter the name of the table as content for “value” without “.ini”. - Change the last row the total number of tables in the section:
<Setting key=“TABLE_COUNT” value=“78” />
to
<Setting key=“TABLE_COUNT” value=“79” /> - Save the file.
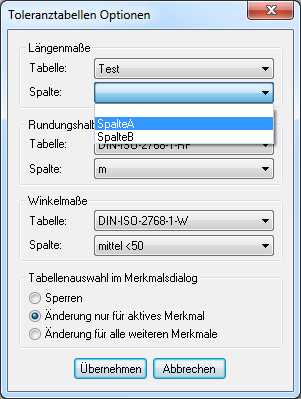
- When you start infra-CONVERT you can now select you new table:
